Settings
The Settings screen is the central place to configure your ARIS experience. Access it from the gear icon on the Home screen. Settings are organized into sections covering your account, appearance, equipment, display preferences, data management, and app information.
Account
Section titled “Account”Sign in to unlock remote access (your rig fleet from anywhere), keep your plan/subscription attached to you, and sync your equipment inventory and named profiles across devices. App preferences like theme and UI scale stay on each device, and rig configuration lives on the rig itself. ARIS supports multiple authentication methods:
- Google Sign-In
- Apple Sign-In
- Email and password
You can start using ARIS without an account. An anonymous session is created automatically and your data is stored locally. When you sign in later, your local data merges with your cloud profile seamlessly.
Theme Presets
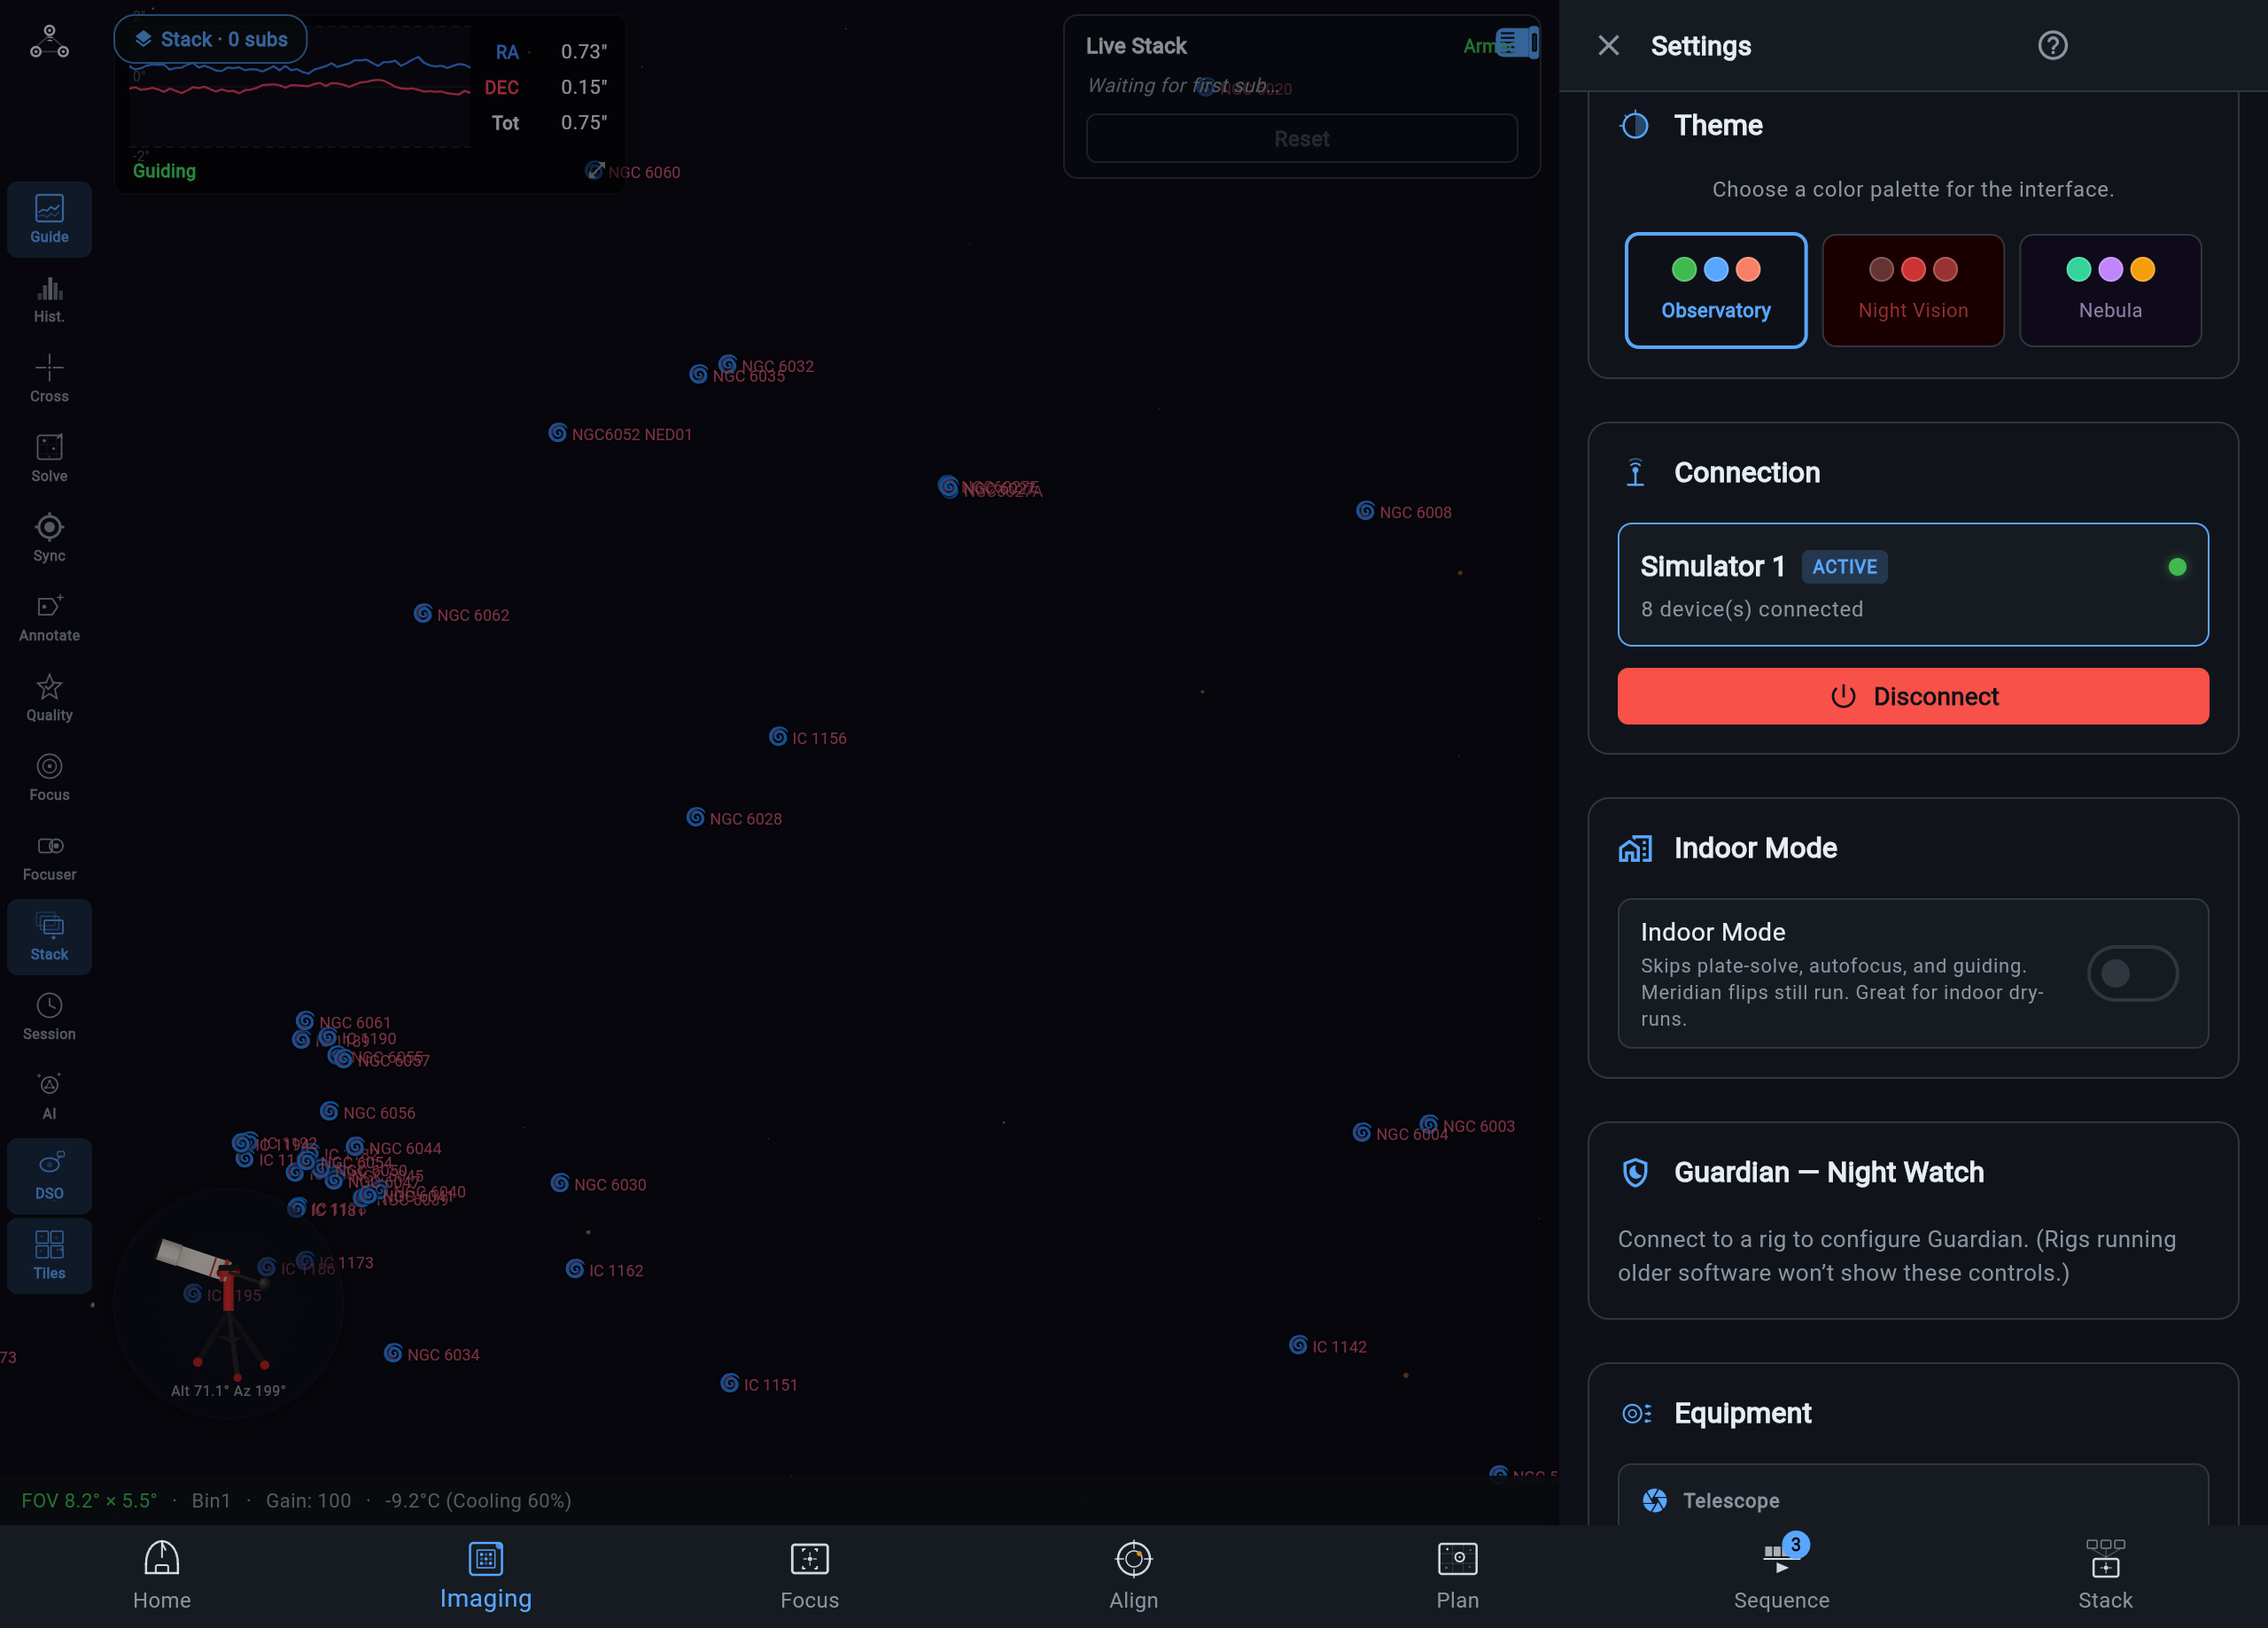
Section titled “Theme Presets”Choose a color theme for the entire interface. Three presets are available:
- Observatory (Blue) — The default theme. A cool blue palette designed for general use and daytime planning.
- Night Vision (Red) — A deep red theme that preserves your dark adaptation at the telescope. All UI elements shift to red-on-black.
- Nebula (Purple) — A purple accent theme for users who prefer a middle ground between the blue and red palettes.
The theme applies globally and takes effect immediately.
Equipment Configuration
Section titled “Equipment Configuration”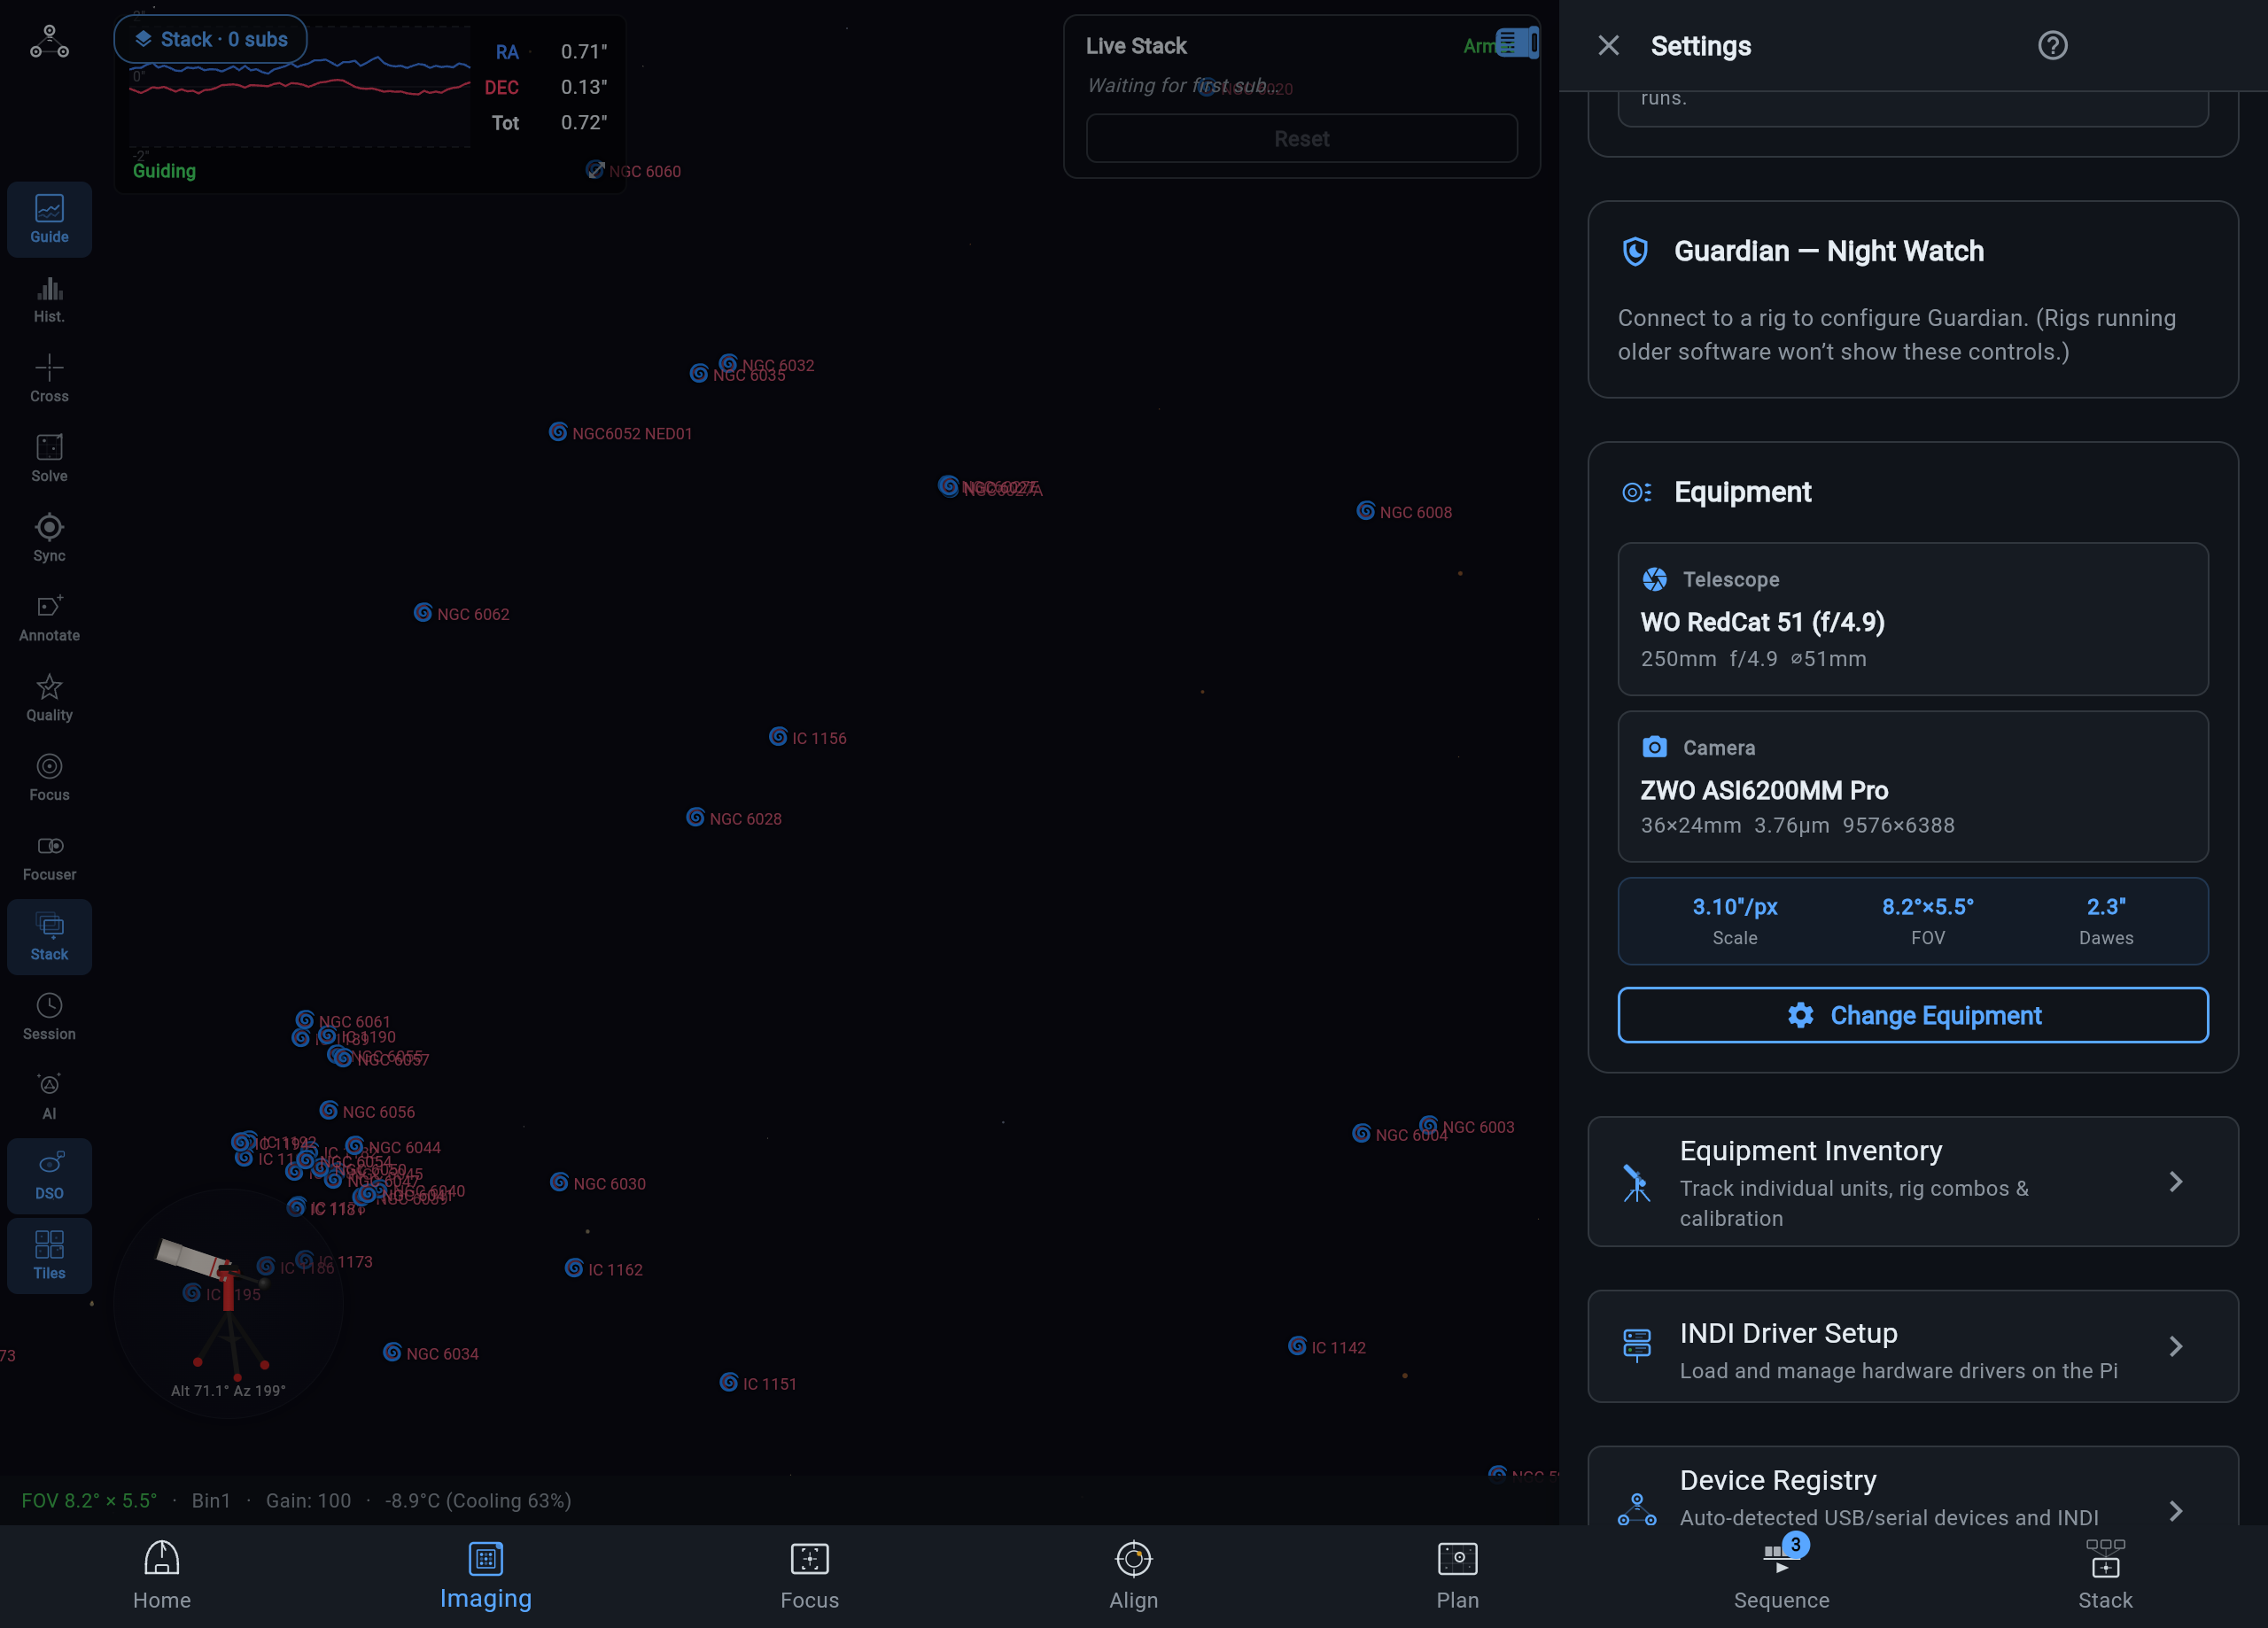
This section shows your current telescope and camera as a pair of info cards. Each card displays the device name and key specifications (aperture, focal length, pixel size, sensor dimensions).
Below the cards, ARIS computes and displays derived optical statistics:
- Image scale — Arcseconds per pixel.
- Field of view — Angular coverage of the sensor.
- Dawes limit — Theoretical resolving power based on aperture.
Tap Change Equipment to select a different telescope or camera from your saved profiles, or to define new equipment.
Equipment Inventory
Section titled “Equipment Inventory”Track your individual hardware units, rig combinations, and per-unit calibration data. The inventory goes beyond generic equipment profiles by recording:
- Individual units — Serial numbers, purchase dates, and notes for each piece of gear you own.
- Rig combos — Named pairings of telescope, camera, guide scope, and accessories that you use together.
- Calibration data — Per-combo calibration frames, backfocus measurements, and tilt data tied to a specific rig combination.
INDI Driver Setup
Section titled “INDI Driver Setup”If you run ARIS with a Raspberry Pi or Linux host, this section lets you load and manage INDI hardware drivers directly from the app.
- Browse the available driver catalog (cameras, mounts, focusers, filter wheels, aux devices).
- Start or stop individual drivers on the remote host.
- Configure driver connection parameters (serial port, baud rate).
Device Settings Live on the Rig
Section titled “Device Settings Live on the Rig”Device-level settings — camera gain, offset, and cooling targets, focuser and guider configuration, dither settings — are stored on the rig itself and persist across rig restarts. A reboot brings your settings back, not defaults, and every device that connects sees the same values.
The same is true of hardware behavior settings that used to live per-device: flat-panel cover open/close durations and angle, and rotator configuration, are kept on the rig — so the sequence runner and every connected app agree on how the hardware moves.
Display Preferences
Section titled “Display Preferences”Fine-tune how ARIS presents information on screen.
- UI Scale — Choose between Default, Medium, Large, or Extra Large. The default fits the most content on screen; larger scales increase text and touch-target sizes, which is helpful on tablets or for gloved fingers in the field.
- Temperature unit — Celsius or Fahrenheit. Affects all temperature readouts (sensor cooling, ambient conditions).
- Coordinate format — Hours-Minutes-Seconds (HMS) or Decimal degrees. Applies to RA/Dec displays throughout the app.
- Time format — 12-hour or 24-hour clock.
Image Library
Section titled “Image Library”Download DSO survey images and sky tiles for offline use. The library organizes downloads by survey and resolution tier.
- Sky tiles — Background sky imagery at multiple resolutions (8K base, higher-resolution tile sets for zoom).
- DSO survey images — Curated images of deep-sky objects from multiple astronomical surveys. These appear as overlays on the sky map and planning screens.
Downloads are large. A progress indicator shows the current transfer, and you can pause or cancel at any time.
Equipment Profiles
Section titled “Equipment Profiles”Save, load, and manage named equipment configurations. A profile captures your telescope, camera, and accessory selections along with all computed optical parameters.
- Save — Store your current equipment setup under a name (e.g., “Wide Field”, “Planetary”).
- Load — Switch to a saved profile with one tap. All dependent calculations (image scale, FOV) update automatically.
- Delete — Remove profiles you no longer need.
Profiles sync to your cloud account when signed in.
Horizon Profiles
Section titled “Horizon Profiles”Define your local horizon to account for obstructions (trees, buildings, mountains) in planning and altitude charts.
- Horizon Scanner — Use the in-app scanner to sweep your local horizon with the device camera and automatically detect the treeline or obstruction boundary.
- Panorama Capture — Capture a 360-degree panorama from your observing site. ARIS extracts the horizon profile from the stitched image using sky segmentation.
- Import — Load a horizon profile from a
.txtor.jsonfile. Standard altitude-azimuth tabular formats are supported.
Horizon profiles overlay on altitude charts and the sky map so you can see at a glance when a target rises above or dips behind local obstructions.
Remote Access
Section titled “Remote Access”The Remote Access sheet pairs your rig with your ARIS account for control away from home. Enter a one-time claim code from the rig, and ARIS sets up a secure connection with no port forwarding or router configuration. See the Remote Access guide for pairing, the fleet picker, and phone notifications.
Guardian
Section titled “Guardian”Guardian settings control ARIS’s overnight safety supervisor: choose the safe state the mount returns to if an unattended sequence fails (Home, Park, or tracking off), and opt in to night mode and GUPPI actions with per-action autonomy levels. See the Rig Guardian guide for what each option does.
SkyNode and Night Settings
Section titled “SkyNode and Night Settings”If your site has a supported all-sky camera, the SkyNode settings pair it with your rig and calibrate the sky view, and the night settings tune cloud detection for your site. See Set Up SkyNode for setup and the SkyNode guide for the cloud overlay.
Rachio Sprinkler Integration
Section titled “Rachio Sprinkler Integration”Connect a Rachio sprinkler controller so your lawn watering never rains on an imaging session: while a rig you’ve marked as outside is powered on, ARIS holds your watering with a Rachio rain delay, and releases it when the rig comes in. Paste your Rachio API token, test the connection, and choose what stands down — schedules that identify the rig’s controller, or a whole controller. See the full Rachio Sprinkler Standby guide for step-by-step setup.
Diagnostics
Section titled “Diagnostics”The Diagnostics screen collects connection and system health details in one place, which is useful when something misbehaves or when filing a bug report. Check it before reaching out to support — it often points straight at the problem.
The About section displays:
- App version and build number
- Links — Privacy Policy, Terms of Service, and the ARIS GitHub repository.