Equipment Setup
ARIS manages eight device types across your imaging rig. This page covers how to register hardware and rig combos, manage INDI drivers, and connect to your rig.

Rig Types
Section titled “Rig Types”ARIS talks to your equipment through a rig computer. Three kinds of rig are supported:
- INDI rig — a Raspberry Pi or Linux machine running the ARIS backend with INDI drivers. The standard setup, and what most of this page describes.
- NINA rig — a Windows imaging PC running NINA with the ARIS plugin installed. NINA stays your capture engine; ARIS becomes the interface for monitoring and control. See the NINA integration guide.
- Smart telescopes — all-in-one telescopes are beginning to join the fleet, with early support rolling out. See Smart Telescopes.
Deciding what to build? Choosing a Rig Computer compares the Raspberry Pi, NVIDIA Jetson, NINA PC, and smart telescope paths.
Supported Device Types
Section titled “Supported Device Types”Camera
Section titled “Camera”The primary imaging sensor. ARIS exposes all settings reported by your camera driver:
- Exposure — integration time from sub-second snapshots to multi-minute captures.
- Gain — sensor amplification. Higher values brighten the image at the cost of more noise.
- Offset — black level pedestal. Match this to the gain table published by your camera manufacturer.
- Binning — pixel grouping (1x1 through 4x4). Higher binning increases signal per pixel and reduces download time.
- Cooling — target temperature, cooler on/off, and live power percentage readout for TEC-equipped cameras.
- USB Bandwidth — throttle the data transfer rate to prevent bus contention when multiple devices share a hub.
- Readout Mode — select between sensor modes (e.g., low-noise vs. high-speed) if your camera supports them.
Motorized equatorial or alt-az mount. ARIS controls:
- GoTo — slew to any sky coordinate or named target.
- Tracking — sidereal, lunar, solar, or custom tracking rates.
- Parking — park and unpark the mount at a defined home position.
- Meridian Flip — automated pier side change with configurable limits, pause-before-flip, and post-flip re-centering.
- Slew Rates — adjustable speed for manual nudge controls (1x through max).
Focuser
Section titled “Focuser”
Electronic focuser for precise focus control:
- Position Control — move to an absolute step position or nudge in/out by a relative amount.
- Temperature Compensation — automatic focus adjustment based on temperature drift. ARIS tracks the temperature coefficient and applies corrections between exposures.
- Backlash Compensation — configurable backlash value to ensure repeatable positioning when reversing direction.
Filter Wheel
Section titled “Filter Wheel”Motorized filter carousel:
- Filter Selection — choose a filter by name or slot number.
- Automated Changes — sequences and the flat wizard switch filters automatically according to your imaging plan.
- Slot Names and Colors — rename each slot and assign it a color so filters are recognizable throughout the app. See Filters & Calibration for slot editing, focus offsets, and the flat wizard.
Rotator
Section titled “Rotator”Field de-rotator or camera angle control:
- Field Rotation — rotate to a specific position angle in degrees.
- Cable Wrap Protection — set minimum and maximum rotation limits to prevent cable tangling. ARIS enforces these limits for all rotation commands.
- Calibration Offset — apply a fixed offset so that 0 degrees corresponds to your preferred orientation (e.g., north up after a plate solve).
For plate-solve-driven framing, calibration, and how sequences reframe rotation automatically, see the Rotator & Auto-Reframe guide.
Guider
Section titled “Guider”Guide camera and autoguiding control:
- Guide Camera — separate imaging sensor used for tracking corrections.
- Calibration — measures how guide pulses translate to star movement on both axes. Run calibration once per session or after changing equipment orientation.
- Autoguiding — continuous tracking corrections based on guide star drift. ARIS displays live error graphs and correction history.
Cover / Flat Panel
Section titled “Cover / Flat Panel”Motorized lens cover and electroluminescent flat panel:
- Brightness Training — ARIS learns your panel’s brightness range by measuring ADU values at multiple levels.
- Flat Wizard — automatically determines the correct brightness and exposure for each filter to hit a target ADU.
- ADU Calibration — per-filter brightness and exposure presets are saved on the rig, one profile per filter and gain, for repeatable flat frames.
Power Box
Section titled “Power Box”Switchable DC power distribution and dew control:
- DC Switch Control — turn individual power ports on and off. Label each port with the connected device name for clarity.
- Dew Heaters — set heater power percentage for each channel. ARIS can display ambient and dew point telemetry if your power box provides it.
- USB Power Groups — control USB port power independently. Useful for resetting a misbehaving device without power-cycling the entire rig.
Equipment Inventory
Section titled “Equipment Inventory”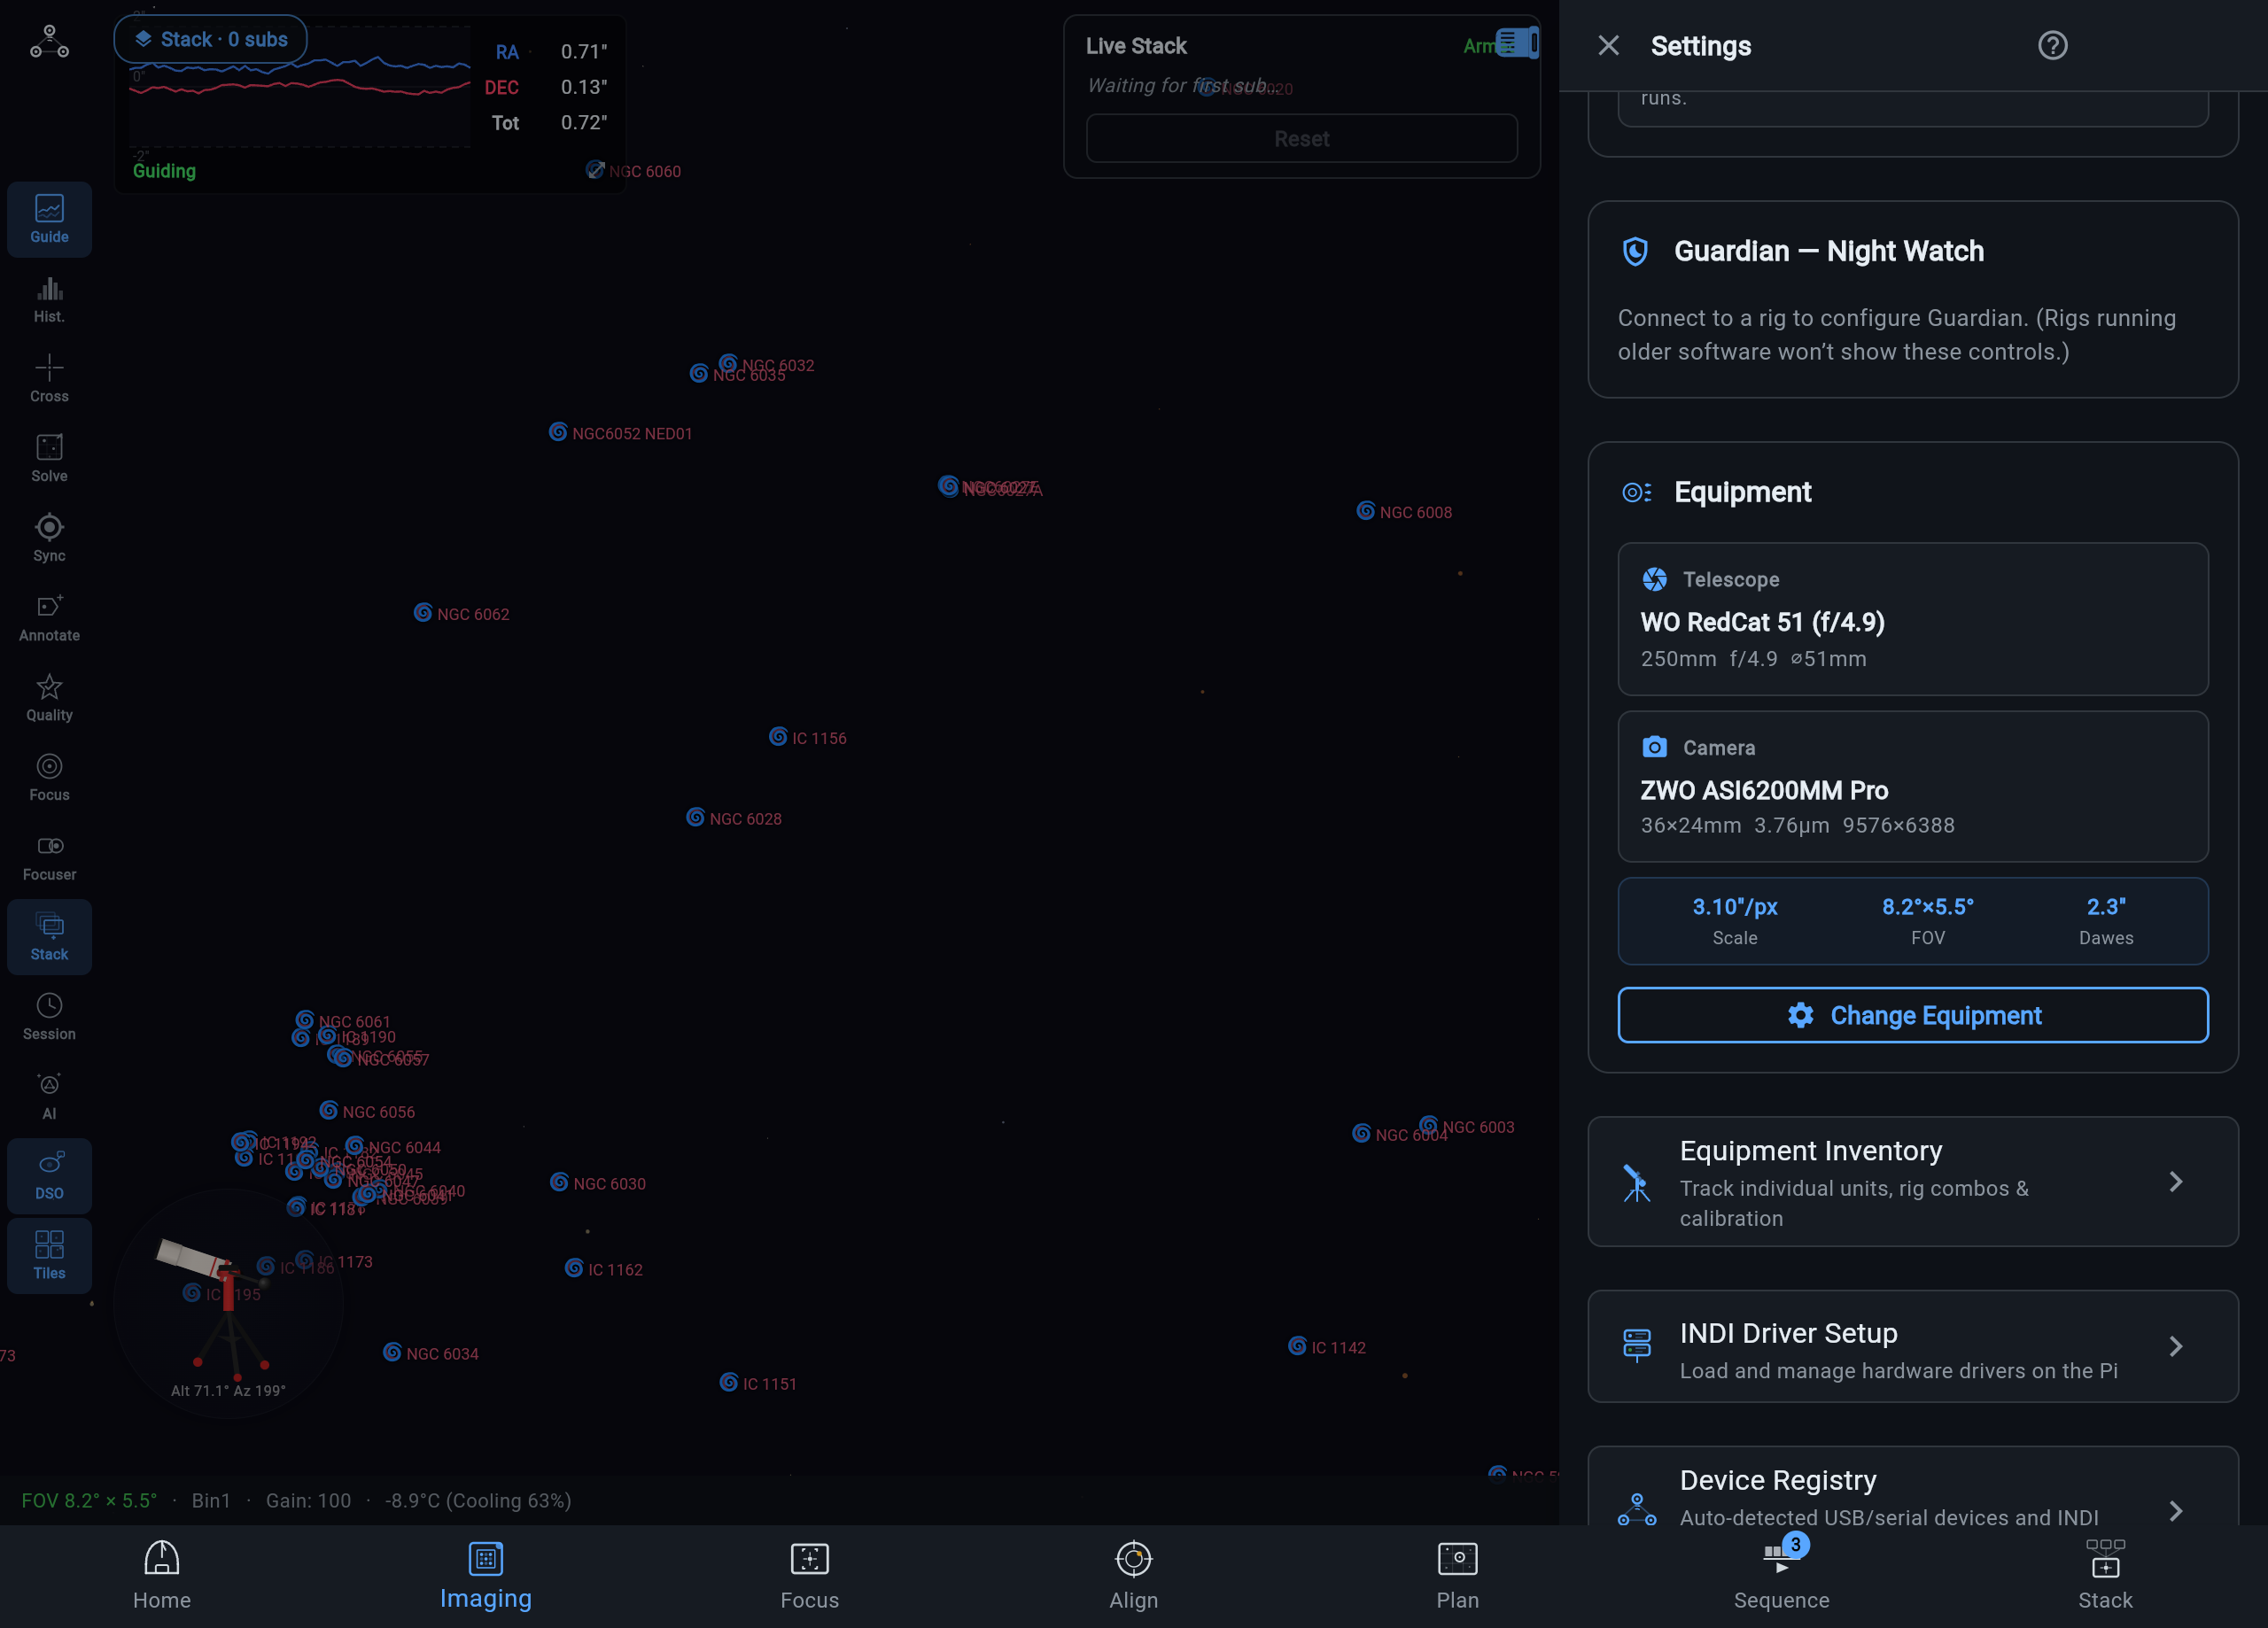
The inventory system tracks your individual hardware units so ARIS can identify them across sessions and rigs.
Registering a Device
Section titled “Registering a Device”Go to Settings → Equipment Library → Equipment Inventory and, on the Units tab, tap +. The Add Equipment form asks for:
- Type — camera, mount, telescope, focuser, and so on.
- Manufacturer — the brand (e.g., ZWO, Celestron, Pegasus).
- Model — the specific product (e.g., ASI2600MC Pro, AM5, Pocket Powerbox Advance).
- Serial Number — optional but recommended. Helps distinguish identical units.
- Nickname — a short label you choose (e.g., “Main Cam”, “Guide Scope EAF”).
Rig Combos
Section titled “Rig Combos”A rig combo is a named combination of inventory devices that image together. For example, your main imaging train might be:
AM5 mount + ASI2600MC Pro + EFW 7x36mm + EAF Pro + ASI220MM guide cam
Creating a rig combo lets ARIS associate calibration data (darks, flats, focus offsets, guide calibration) with that specific hardware combination. When you swap a component, create a new combo so calibration data stays matched to the correct hardware.
Hardware Fingerprinting
Section titled “Hardware Fingerprinting”When ARIS connects to a device, it reads identifying properties from the driver (vendor ID, product ID, serial string, firmware version). This fingerprint is matched against your inventory automatically, so ARIS can recognize your devices even if you connect from a different backend or the USB port order changes.
INDI Driver Management
Section titled “INDI Driver Management”ARIS connects to equipment through INDI drivers running on your rig (typically a Raspberry Pi or Linux machine). Manage them in Settings → Advanced → Driver Setup.
Discovering Available Drivers
Section titled “Discovering Available Drivers”Driver Setup lists every INDI driver installed on the rig, grouped by category (camera, mount, focuser, etc.), with a search box for make, model or category. Each driver shows:
- Label — the human-readable name (e.g., “ZWO CCD”, “LX200 AM5”).
- Driver name — the INDI driver identifier (e.g.,
indi_asi_ccd,indi_lx200am5).
Loading and Unloading Drivers at Runtime
Section titled “Loading and Unloading Drivers at Runtime”When the banner at the top reads Live driver control, you do not need to restart the INDI server to add or remove devices:
- Start a driver — tap the add button (Start driver) on a driver under Available Drivers. The driver starts immediately, moves to Active Drivers, and its devices become available for connection.
- Stop a driver — tap the stop button (Stop driver) on a running driver. The driver stops and its devices disconnect.
This is especially useful when you add a device mid-session (e.g., plugging in a USB power box after the session has started).
Saving Driver Configurations
Section titled “Saving Driver Configurations”Once you have the right set of drivers running, tap Save & Apply. The rig saves them and loads the same drivers whenever it starts. On a NINA rig nothing is saved here: NINA keeps each device in its own active profile.
Connection Flow
Section titled “Connection Flow”Connecting ARIS to your equipment follows a consistent sequence:
-
Pick the rig — tap a rig the connection screen found on your network, or type its address under Manage Array → Open Array → Connect to Agent: a name such as
aris-pi-ai.localor an IP address such as192.168.1.100, with port 8080 unless you changed the rig’s port (the pencil next to its name in Settings → Connection). ARIS connects to the ARIS backend on that port; the INDI server itself is internal to the rig and never needs to be addressed directly. -
HTTP API + WebSocket — ARIS establishes an HTTP connection for commands and a WebSocket for real-time telemetry. Both connections go to the same backend address.
-
Equipment step — the first time you connect to a rig with no equipment saved, ARIS asks for its imaging camera and telescope, and, when it sees two or more cameras, which one guides. See First Connection.
-
Devices connect on the rig — a Raspberry Pi or Linux rig connects its devices itself when it starts. Home counts the connected devices under EQUIPMENT, and Connect All connects any that are not.
-
Fingerprint auto-match — ARIS reads the rig’s hardware fingerprint and matches it against your inventory: the connection screen shows Matched: and the rig combo’s name, or New equipment detected — register in Equipment Inventory.
Equipment on the Rig
Section titled “Equipment on the Rig”The rig keeps its own equipment record — its telescope, its cameras, and which camera images and which one guides — so every device that connects to it sees the same setup. You answer it once in the first-connection equipment step, and change it later in Settings → Equipment (Change Equipment). The drivers the rig loads at start are saved on the rig too, from Driver Setup.