Multi-Rig Array
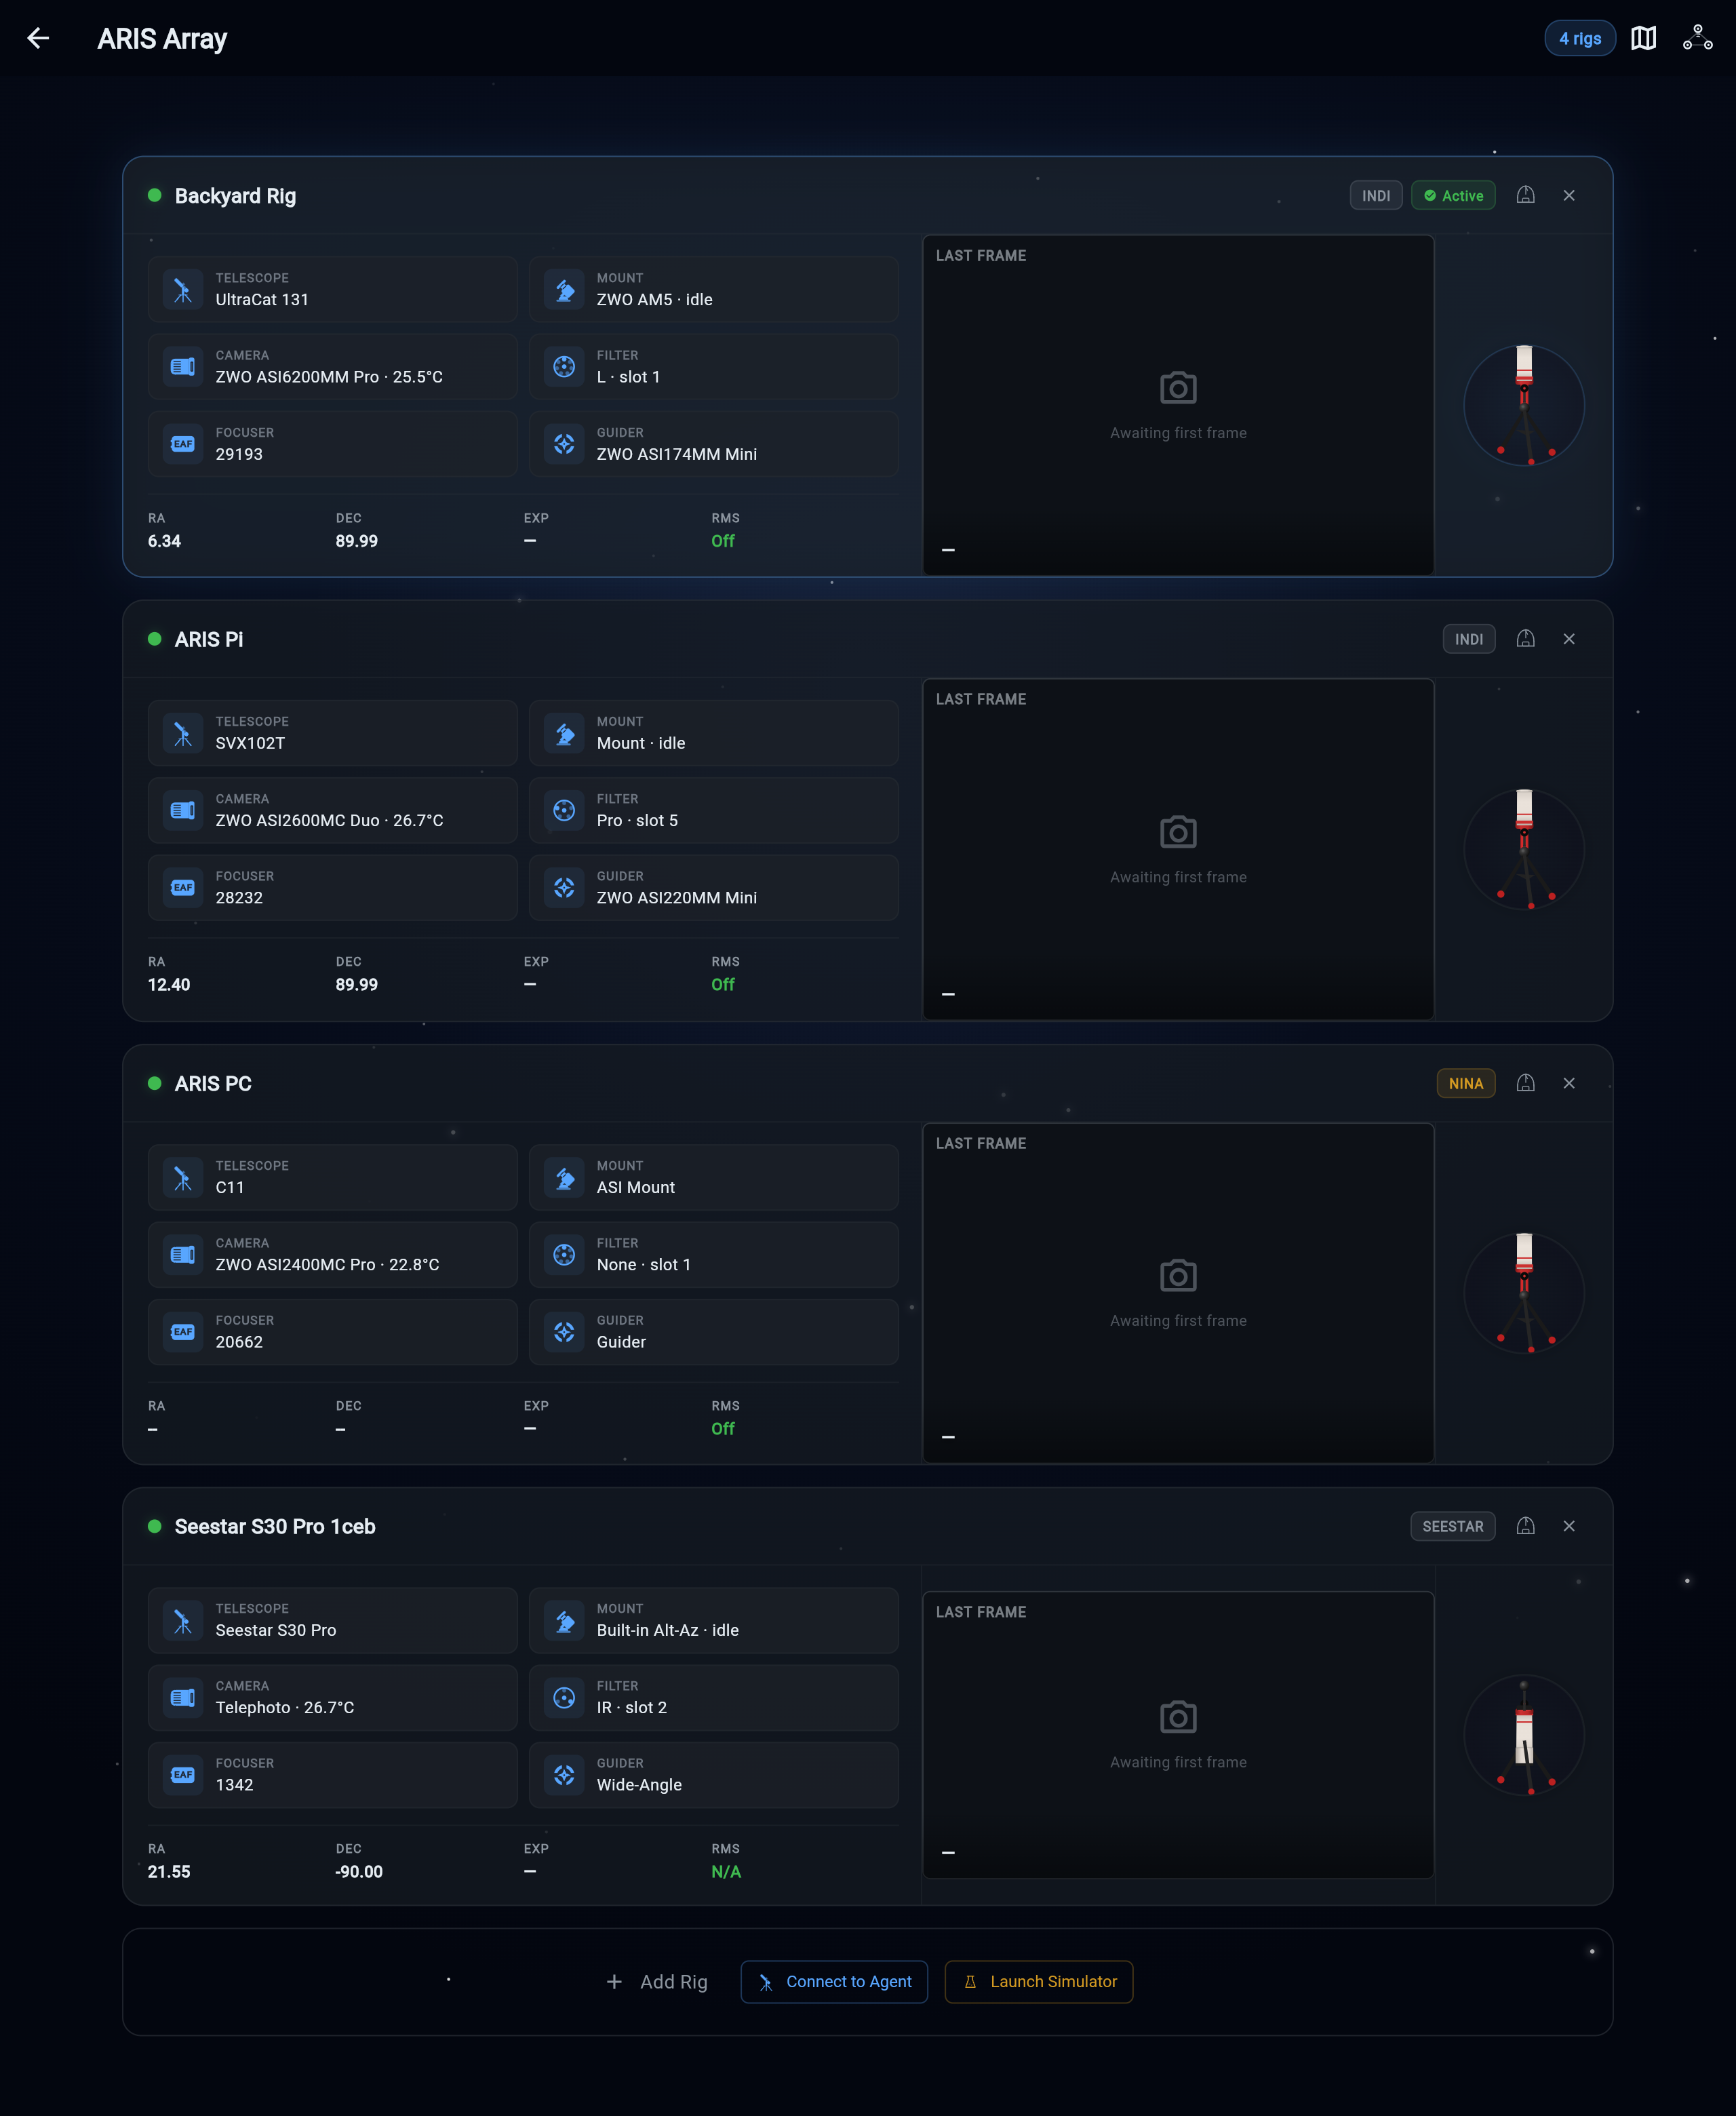
ARIS treats your rigs as a fleet. Each rig appears as a card on the Home screen with live status, equipment details, and a thumbnail of its latest capture — whether it’s a Raspberry Pi in the backyard, a GPU-accelerated rig computer under a wide-field setup, or a Windows imaging PC running the ARIS NINA plugin. Switch between them instantly and monitor the whole array at a glance.
Adding rigs
Section titled “Adding rigs”On your home network: automatic
Section titled “On your home network: automatic”Tap Add Rig and ARIS scans your network — rigs are discovered automatically via mDNS, with a subnet sweep as a backstop for networks that block it. Healthy rigs appear in the list within seconds; tap one to connect. No IP addresses to memorize, no router configuration, ever.
From anywhere: your signed-in fleet (beta)
Section titled “From anywhere: your signed-in fleet (beta)”Sign in at app.arisastro.com (or in the apps) and your fleet follows you:
- Pair once with a claim code. The ARIS installer on the rig prints an 8-character code; enter it under Add Rig and the rig joins your fleet in under a minute — see Pair for Remote Access. The rig builds its own secure outbound tunnel: no port forwarding, no router changes.
- Live presence. Every claimed rig shows online/offline state in the fleet list, from anywhere.
- Connect remotely. Tap a rig and control it over its tunnel — same UI, same features. Only your signed-in account can reach your rigs. See Remote Access for the full story.
- Direct at home. When you’re on the same network as the rig, ARIS notices and connects directly over the LAN automatically — the tunnel is only used when you’re actually away.
Manual entry (fallback)
Section titled “Manual entry (fallback)”If discovery can’t see a rig (isolated VLANs, unusual network setups), you can still connect directly: enter the rig’s hostname or IP address and port (default 8080) in the Add Rig dialog. You can also Launch Simulator here — simulated and real rigs mix freely in the same array, which is handy for testing a sequence plan before running it on live equipment.
Rig cards
Section titled “Rig cards”Each card surfaces the essentials at a glance:
- Status dot — pulsing green for the active rig, solid green for connected-and-idle, yellow while connecting or recovering, red when unreachable.
- Name and badges — your rig’s name, its connection type, and an Active badge on the rig currently receiving commands.
- Equipment summary — telescope and camera from that rig’s equipment profile, plus computed stats (image scale, field of view) derived from it.
- Live telemetry — mount coordinates, sensor temperature, cooler power, focuser position.
- Latest frame — a thumbnail of the most recent captured or stacked image.
Per-rig equipment profiles
Section titled “Per-rig equipment profiles”Every rig keeps its own equipment profile, stored on the rig itself. Your wide-field Pi and your long-focal-length rig each know their own mount, camera, filter names, and focus offsets — connect from any device and the right configuration is simply there. Nothing about a rig’s identity lives in your browser.
Switching and working across rigs
Section titled “Switching and working across rigs”Tap a card to make that rig active; open it to get the full dashboard — imaging, focusing, guiding, sequencing, and planning all scoped to that rig. Inactive rigs suspend their live streams to conserve bandwidth and resume instantly when you return.
Because each rig runs its own sequences on its own backend, a sequence on one rig continues untouched while you inspect or control another — or while you disconnect entirely. And each rig’s camera-owner interlock means competing flows can’t fight: if a sequence owns the camera, a second device (or a stray tap) can watch everything live but can’t accidentally fire a conflicting capture.
Removing a rig
Section titled “Removing a rig”Tap the X on a rig card to disconnect it from this session; if it’s mid-sequence you’ll be asked to confirm (the sequence itself keeps running on the rig). Removing a card never touches the rig — re-add it any time via discovery, your fleet, or manual entry.